
What Are Hand Hewn Log Homes?
Ever wondered how square logs were created before the age of machinery?
Let me introduce the ancient method of ‘hewing’ logs.
While it is true that most people now either use full-rounded logs or have their logs squared at a sawmill, there are many people who still use the ‘hewing’ technique to create log cabins.
But what is hewing, and how do you do it?
What is Log Hewing?
To ‘hew’ simply means to chop or cut something with a sharp tool, usually an ax.
Hewing is the process of turning a full log, into a log with one or more flat surfaces.
Hand-hewn logs are those that have been flattened or squared using only handheld tools. It is an extremely laborious task, but one that is still favored by many carpenters for the traditional appearance it creates.
Hewn timber can then be used for beams, joists, trusses, or even log cabin walls.
 Here is an example of a hand hewn log home- notice the square logs
Hewing History
Before the 1800’s logs were commonly hewn into shape using an ax, which was known at the time as an ‘adze’.
Early settlers in America felled their own trees, de-limbed them, transported them to the site, scored and squared them.
The process was not quick or easy – and therefore this was a job for skilled carpenters and craftsmen.
Along with the invention of steam power, rough sawn beams were readily available, and fewer people hand-hewed logs as a necessity.
However, many people were still too far from sawmills and continued well into the 1800s to hew their own logs. This was often cheaper and made more sense if they had land to clear or nearby trees.
These old hand-hewn log homes are a testament to the sheer amount of work and effort it took to build shelters and survive during this period of life.
How to Hew
The process to hew depends on whether living trees or reclaimed wood will be used.
If you are starting the process with felling your own trees, start at step 1. If you are using reclaimed wood, you’ll need to determine how far along the hewing process your wood already is.
Step #1: Select & Fell your Logs
When you select tress, you should make sure they:
- Have a suitable girth (I recommend at least 10 inches for a log cabin)
- Are tall enough for the width of your cabin
- Are straight
Make sure you know how to fell a tree safely, and which tree species you want to use.
The best species for hand hewing are:
- Hardwoods – Red and White Oaks, Ash and Marple
- Softwoods – Cedar, Pine, Spruce and Hemlock
You will then need to move your logs to the location you intend to prepare them in.
Step #2: Prepare your Logs
Tools you will need:
- 2 timber dogs (dog logs)
- 2 support logs or sawhorses
- Try-square
- Chalk line/chalk box
- A felling ax
- A broadax
- An adze
To prepare the log ready for hewing, it needs to be lifted up to keep it off the ground. To do this you can use two notched logs underneath, or you can use a couple of sawhorses.
To keep the log in place, use two ‘timber dogs’ to jam into both the main log and the support log. You should do this at both ends of the log, into the two supporting logs.
N.B: A timber dog is a long iron bar with a spike on either end.
Once the log is off the ground, you will need to mark a square (which will be the final size of your log) onto the end of the log using a pencil and a try-square.

Next, you need to make two straight parallel lines down the length of the tree to act as guides. To do this, use a chalk line.
A chalk line is a tool that marks a long straight line. It achieves this by being laid out along the surface of the log and being plucked sharply. The string will then transfer the coating of chalk from the line to the tree.

This is a fantastic tutorial on how to mark the square and chalk line on your logs.

Step #3: Score your logs
Using a felling ax, you now need to score your tree every 1 to 2 feet the whole way across. You are aiming to make them almost as deep as the guidelines you have created.

To score the logs, you should create a ‘V-shaped’ groove by bringing the felling ax down at an angle into the log.
Step #4: Joggling/Juggling
The next step is to remove the bark and wood in between the scored marks, all the way across the length of the log.
Use a broadax to remove the sections, to leave a flat surface. The broadax has a flat and a convex side, the flat side should be against the wood, the convex side pointing away.
Work your way across the log with the broadax, carefully watching out for notches, and working with the grain. This step should not take as long as the scoring.
You should repeat the previous steps for the remaining three sides to create a square log.
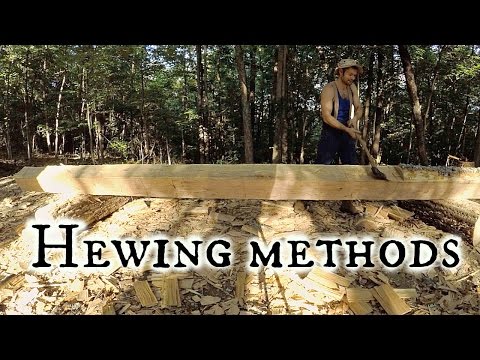
This video shows three different ways to hew a log, two techniques require just one man, and the other is handy if you have a partner:
Step #5: Final Hewing
Now that the log is square, you may want to give it a more attractive finish by using an adze.
The adze can be used to remove any imperfections. To use the adze, use small swings when approaching the log then a large swing to finish it.
This video will give you some great tips on using an adze:

If you don’t want your log completely smooth, there are a few different finishes you can create. Check out this video out for some different finishing ideas:

Summary
Hand Hewn Log Cabins have been around for many years, they are very aesthetically pleasing, and the work that goes into them is plentiful!
Hand-hewn log homes are homes that are created from hand-cut logs using only handheld tools. They are a rarity in the 21st century, due to the sheer amount of work they require.
However, there are many craftsmen and carpenters today who still like to create these buildings of beauty.
Hand-hewing logs, gives them an undeniably beautiful finish, but is it worth all that laborious work? What do you think?
