
Simple Options to Weatherproof your Log Cabin
One of the most quoted reasons for wanting to live in a log cabin, second to only the freedom of a log cabin, is the rustic feel that comes with a natural log home.
If you’re reading this and have lived or vacationed in a log cabin then you will know exactly what we mean by this – the look, feel and smell of the timber is fantastic.
With this rustic feel comes danger! Regardless of the visual benefits of leaving the timber in its natural exposed form, it is important to make sure you weatherproof your log cabin and treat the timber.
Protecting and maintaining your timber is an easy job, but it’s often neglected or forgotten about – don’t let this be you! It can have a disastrous effect such as log rot or decay.
And, timber maintenance is only one step you can take to preserve your log home. Keep reading to explore the six simple and specific steps you can take to weatherproof your log home and prolong its lifespan.
1. Large roof overhangs

Dampness is the main cause of log cabin deterioration. Having a large roof overhand ensures anything that does fall from the sky lands far away from your cabin. This keeps the amount of rain that does hit your timber to a minimum.
Large overhangs also keep that dreaded sunlight off your cabin’s timber providing shade in the hot months. Having a suitable roof overhang can be the main difference between a cabin that is derelict after 30 years or still in fine condition.
Lots of cabin designs ignore the importance of roof overhangs in their design. The most common mistake is making the overhang too short to save on construction costs.
If your roof overhang is too short then your cabin will be susceptible to repeated wettings, especially in high rainfall areas, which can disrupt the moisture content of your logs, cause premature timber failure, multiple ingress points and increase maintenance costs due to repeated staining.
Top-tip
The size of your cabin’s overhang will be linked to the pitch of your roof. However, ideally, you want to use a 36” overhang as a minimum on the gable ends.
In a hot northern hemisphere climate, the overhang of your roof should really focus on the south side of your cabin, as the sun’s UV will punish this timber. The northern-facing elements of your cabin, such as doors and windows, should receive less attention.
Top-tip
When constructing your overhangs make sure you use rain gutters. Many log cabin owners avoid the installation of gutters at their peril. Log cabin guttering will help to mitigate timber rot and add to your cabin’s robustness.
2. Stain and Sealing(Waterproofing)

Moisture in hot and humid climates can very quickly become a large enemy to your log home.
The three most important elements that can impact the weatherproofing of your cabin are the natural climate, cabin footprint (size), and your budget.
Before you start staining your log cabin, remember that the timber’s longevity will depend upon how thorough you are when it comes to preparing:
- When delivered to the site your logs won’t be in perfect condition. Your timber may have mill gaze, road dirt from haulage, and dirt from the construction site. Start by corncob blasting your timber to restore your timber to its original state.
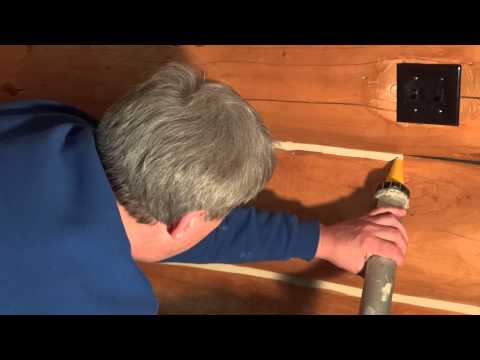
- Any crack or hole larger than 5mm should be filled with elastomeric caulking. Termites and carpenter bees (read) can plague cabins in warmer climate.
Once you’ve prepared your cabin it’s then important to select the right stain for your cabin.
Dark tone stains typically provide better protection from weathering due to their additional pigmentation. Lighter tone stains are more prone to getting sunburn.
Having used permachink in the past for both log finishing (stain) and sealing, I would suggest you make sure to compare your stain against theirs. Make sure to compare the raw materials and warranty offered by the stain manufacturers with permachinks – this will give you a good rule of thumb if the stain you’re purchasing is high quality or not. You can read more about caulking here.
The interior needs staining too…
If you’ve decided upon leaving the inside of your cabin exposed then make sure you stain certain interior rooms which will be prone to damp.
A good example is a bathroom; showering and running hot water will cause steam condensation, which attacks your timber from the inside! Make sure to stain these rooms and also to use a bathroom extractor that will remove the steam from the room.
Top-tip
Typically, we would recommend that once erected you should stain your log cabin as soon as the local climate permits – ideally within the first week.
After six months the warping and shrinkage of the timber should have settled down.
If you leave your log home for a couple of years before its first stain and waterproof treatment then the warping and shrinkage will have allowed for small ingress points allowing water to penetrate your cabin.
Remember
The ideal moisture content for your logs is around 14-15%. Typically, anything above 18% will cause mildew and mold, and anything above 20% will cause blistering and rotten timber.
If your cabin has been standing for a few months without any staining then use a moisture meter to measure the cabin’s moisture content before proceeding.
3. A good foundation

Whilst a large roof overhang will ensure water doesn’t drip near the foundation and splashback damage is mitigated it isn’t the only solution. Foundations that your cabin sits upon can very easily start to transmit dampness into the base of your cabin. If your foundation hasn’t been laid correctly, it can be equally vulnerable to penetrating moisture.
Waterproofing your foundation will reduce water seepage and transmission to a minimum – the best method is to deal with waterproofing on the outside of your foundation where it’s most likely to exist.
To mitigate water seepage you need to place a membrane between the foundation pad and your cabin. This can be achieved with two approaches:
- Placing insulation in the base of your cabin to act as a membrane between your cabin and the concrete pad.
- Alternatively, if you’re on a budget, then placing plastic bags or plastic liner in the base of your cabin home can be an effective liner.
You can read more on the different foundation techniques for log cabins and how to apply them to your log cabin.
4. Regular Maintenance

Building a new log cabin will ensure your family has lots of holidays together, maintaining a log cabin will ensure future generations have lots of holidays together!
Maintaining your log cabin is all about keeping the effects of the sun, water damage, and insects to a minimum.
If you have applied good log cabin design and construction prudence (such as large roof overhangs, rain guttering, and foundations) then log cabin maintenance shouldn’t be difficult.
Simple tips, such as removing insects, pollen, and dust from the logs each season are a very good start. Obviously, most of your work and attention will on the south-facing side of your cabin.
After routine cleaning annual staining is essential. Some cabin owners view the stain and caulking process as a one-off. Continuous application of staining may be laborious but the costs of maintenance will be dramatically reduced to just the cost of a few tens of stain each year.
A good solution to apply when cleaning your cabin before staining is oxygen bleach. Oxygen bleach is a powder form, which you can mix with water to create a cleaning solution. When using a solution apply the cleaner from the bottom-up and rinse from the top-down – this prevents the uneven application of cleaning solution to your timber.
Top-tip
When you are cleaning your cabin always start with a small patch in the corner to test the solution doesn’t create an undesired impact on your cabin.
Top-tip
Don’t use a pressure washer or harsh chemicals when cleaning your cabin! Forcing water into the logs at high pressure can cause you to alter the humidity of your logs and drastically shortening the life span of your cabin.
Top-tip
Get a wet sponge and rinse the sponge on your cabin, if the water beads and runs off the logs fast then it’s a good sign an oil-based preservative has been used. If the timber absorbs the water then the protective lacquer has likely worn off.
Keep an eye out…
During periods of maintenance lookout for caulking that has come adrift. If you find any, cut the remaining caulking out with a knife, let the timber dry, and then apply a new layer of caulking before you stain the cabin.
5. Construction type

Your cabin construction type (hand-made or kit-made) will also have a large influence on how well your cabin preserves.
Handmade cabins, where the timber is harvested and hewn on-site, will require sealing. Sealing ensures that logs, which don’t perfectly fit, have a nice seal. Permachink is a sealant you can use to apply in the gaps between your hewn logs to prevent external infiltration (air and water) and heat loss.
Top-tip
Always remember when using caulk to apply a first coat of stain before caulking.
Alternatively, if you have purchased a kit-cabin then typically the logs align very well and interlock with a tongue and groove joint which is more resistant to weathering.
The selection of hand-made or kit-cabins may also impact the vertical wall shrinkage. Vertical wall shrinkage is something we discussed in number one tips for log cabin homes
Vertical wall shrinkage is often forgotten about when building log cabins but is a very important factor. Vertical wall shrinkage is most prevalent in naturally harvested logs
Whatever construction type you select, simple additions to your cabin such as lead flashing above all of your doors and windows will help to mitigate jamb rot.
An alternative approach is to recede the openings into the cabin using the natural depth of the log to provide natural protection.
6. The power of ventilation

Proper ventilation in your log cabin will allow for natural drying of the logs and continuous air movement.
Ventilation becomes more important depending upon the type of cabin your have built.
If your cabin is being used all year round then it’s plausible that the constant opening of windows and doors will provide suitable ventilation for the circulation of air in your cabin.
However, if your cabin is a holiday or seasonal cabin then ventilation becomes very important.
There is some truth to the fact that cabin’s can breath naturally as they are made from timber, however, in my experience I have found this is very limited and if left locked up for a few months doesn’t really provide any benefit.
Purchasing a few natural air vents from your local DIY store and installing them in your cabin is very fast and easy but can avoid common issues.
The best option is to have two air vents facing opposite each other with one near the floor and one near the ceiling.
Effects of not installing ventilation
Pressure and moisture builds up internally in a log home, due to minor pressure differences internally and externally, and is forced out through tiny cracks and imperfections in the cabin.
Installing ventilation will help to mitigate from the potential damp and cracking caused by pressure differences.
In summary, start you log cabin home construction process with design prudence (roof overhangs, rain guttering and air ventilation). Apply the best stain and caulk internally and externally. Finally, perform regular maintenance to remove mildew, pollen and dust from your cabin and regularly stain.
If you follow these six simple steps your cabin will be passed form generation to generation and will preserve very well.
Do you have any comments or pieces of advice for weatherproofing a log home? Why not share them in the comments below?

My problem is in wet years a dark mold appears and must be removed each year.
Yes, this can be a problem Susan,
Is this towards the bottom of your cabin?
If so, it might be being caused by splash-back, take a look at this to help mitigate and prevent it http://logcabinhub.com/log-cabin-maintenance-costs/
Thanks,
David
A friend has an old, dilapidated cabin on Lake Vermilion in Minnesota. The roof is full of moss, because of the trees, and the walls & floors are soak & wet from rainwater. The owner might offer the building at a discount. If someone were to take on restoring an old, water-logged cabin, is it necessary to tear the structure down & start over? Would one use the existing cement base that was originally there, or would the entire building have to be excavated and torn down? There is a really cool brick wall with a wood stove, and the layout is a cute, two-bedroom house with a kitchen, bath, and entryway.
Hi Sheri,
Please would you email me pictures of the cabin so I can try to assess the condition for you. Typically if the logs are water soaked yes, you would need to replace them. The foundation will be okay.
Thanks,
Hi
We have a log cabin and if there is a couch , bed etc against the wall it gets mold all along . I put a vent in but still no luck what could I do to prevent this so we can put things against the walls again
Thanks
Hi Ciaran, in order to get further into this with you I need to know what color the mold is and see some pictures of it and the surrounding area. Email me at david@logcabinhub.com with some details and we can continue this discussion. Thanks, David
Good evening,
we are building a new log cabin and we not sure how to do our shower room. We are looking advice on pvc panels or proper tiles from the floor to lower wall height. Can pvc panels be fitted directly onto the wood walls and will it causes mildew and mould on the logs.
Many thanks
Hi Catherine, yes PVC panels can be fitted directly to wood but as one of the prerequisites for mould and mildew is damp, if the seals around the PVC panels fail then yes, the wood will not get enough ventilation to dry out after water leaks in. Make sure it is properly sealed and just keep an eye on the sealant. Any holes, gaps or mildew that forms on it is the sign that it needs to be replaced. Good luck, David.
It’s been raining lots recently and I have noticed that the bottom two panels of my cabin are wet from the inside. I can’t see any holes on the outside. How is this possible and what can I do to treat this and prevent this?
Hi Sabrina, thanks for your question. If you send some pictures to me at david@logcabinhub.com then I can give a better answer. For now, if the external logs are properly sealed then the most likely reason for this is condensation from the inside. I would be looking at whether the timber inside has been sealed/stained, if the waterproof membrane beneath the cabin is intact and whether the cabin is well ventilated. Thanks, David
Hi,
My Husband and I are building a Log Cabin as our ForeverHome. We bought a Kit and had someone erect it. My situation is: the downstairs bathroom will be a “wet room”, a toilet, sink, shower body and trough floor drain. I want to leave 2 of the walls natural (just the logs) and the others will be tiled. Would I waterproof them like a new deck?
Thank you
Hi Joelle, yes I would recommend waterproofing them. I’d make sure you do this once every couple of years too, as it will likely be used frequently. Many thanks, David
I’ve got a cabin already designed so tongue and groove walls and one wall is open to the elements, I’ve painted the outside with about 5 coats, but in the last couple of days with the rain I’ve had a few leaks , water is dripping from knots inside the cabin ( this was left unpainted ) it’s not a lot but you can see water has come through , how can I stop the leaks ?
is it something I can do from outside or inside please
Thankyou
Stacey
Hello Stacey,
It’s difficult to say without more infos/pictures. What I suggest is to work on the outside. Check my post about Chinking here :http://logcabinhub.com/log-cabin-chinking/.
You want to avoid having some water and humidity into your logs because it will rot sooner or later.
Check also my post about log home maintenance.
David